Software Toolchain Setup
In this tutorial, Ubuntu Linux will be used. To compile and debug executables for the NEORV32, we have to follow the procedures to build the following tools:
riscv-gnu-toolchain is a RISC-V C and C++ cross-compiler that fits the architecture of NEORV32 core.
$ git clone https://github.com/riscv-collab/riscv-gnu-toolchain.git
$ cd riscv-gnu-toolchain
$ sudo apt-get install autoconf automake autotools-dev curl python3 libmpc-dev libmpfr-dev libgmp-dev gawk build-essential bison flex texinfo gperf libtool patchutils bc zlib1g-dev libexpat-dev ninja-build
$ ./configure --prefix=/opt/riscv
$ sudo make -j4 # this include install
$ echo "export /opt/riscv/bin:$PATH" > ~/.bashrc
$ source ~/.bashrc
arachne-pnr is a tool that implements the place and route step of the hardware compilation process for FPGAs.
$ sudo apt-get install build-essential clang bison flex libreadline-dev gawk tcl-dev libffi-dev git graphviz xdot pkg-config python3 libboost-system-dev libboost-python-dev libboost-filesystem-dev zlib1g-dev libqt5gui5-gles qtbase5-gles-dev libftdi*
$ git clone https://github.com/cseed/arachne-pnr.git
$ cd arachne-pnr
$ make -j
$ sudo make install
nextpnr is a vendor neutral, timing driven, FOSS FPGA place and route tool.
$ git clone https://github.com/YosysHQ/nextpnr nextpnr
$ cd nextpnr
$ sudo apt install libboost-all-dev libeigen3-dev
$ cmake -DARCH=ice40 -DCMAKE_INSTALL_PREFIX=/usr/local .
$ make -j
$ sudo make install
yosys is a framework for RTL synthesis tools.
$ git clone https://github.com/YosysHQ/yosys.git
$ cd yosys
$ make config-gcc
$ sudo make install -j
ghdl is an open-source analyzer, compiler, simulator and (experimental) synthesizer for VHDL, a Hardware Description Language (HDL).
$ git clone https://github.com/ghdl/ghdl.git
$ cd ghdl
$ sudo apt install gnat
$ ./configure
$ make -j
$ sudo make install -j
ghdl-yosys-plugin is a VHDL synthesis based on GHDL and Yosys.
$ git clone https://github.com/ghdl/ghdl-yosys-plugin.git
$ cd ghdl-yosys-plugin
$ make
$ sudo make install -j
neorv32-setup is a repository that provides community projects as well as exemplary setups for different FPGAs, platforms, boards and toolchains for the NEORV32 RISC-V Processor. Project maintainers may make pull requests against this repository to add or link their setups and projects.
$ git clone --recursive https://github.com/stnolting/neorv32-setupsgtkterm is a simple, graphical serial port terminal emulator for Linux and possibly other POSIX-compliant operating systems. Alternatives such as cutecom can be used.
$ git clone https://github.com/Jeija/gtkterm.git
$ cd gtkterm
$ sudo apt install meson libgtk-3-dev libvte-2.91-dev libgudev-1.0-dev
$ meson build
$ ninja -C build
$ sudo ninja -C build install
isugar tools
$ git clone https://github.com/wuxx/icesugar.git
$ sudo apt-get install libhidapi-dev libusb-1.0-0-dev
$ echo "export {full path to icesugar}/tools:$PATH" > ~/.bashrc
$ source ~/.bashrc
icestorm documents the bitstream format of Lattice iCE40 FPGAs and providing simple tools for analyzing and creating bitstream files.
$ git clone https://github.com/YosysHQ/icestorm.git icestorm
$ cd icestorm
$ make -j
$ sudo make install
Hardware Connection
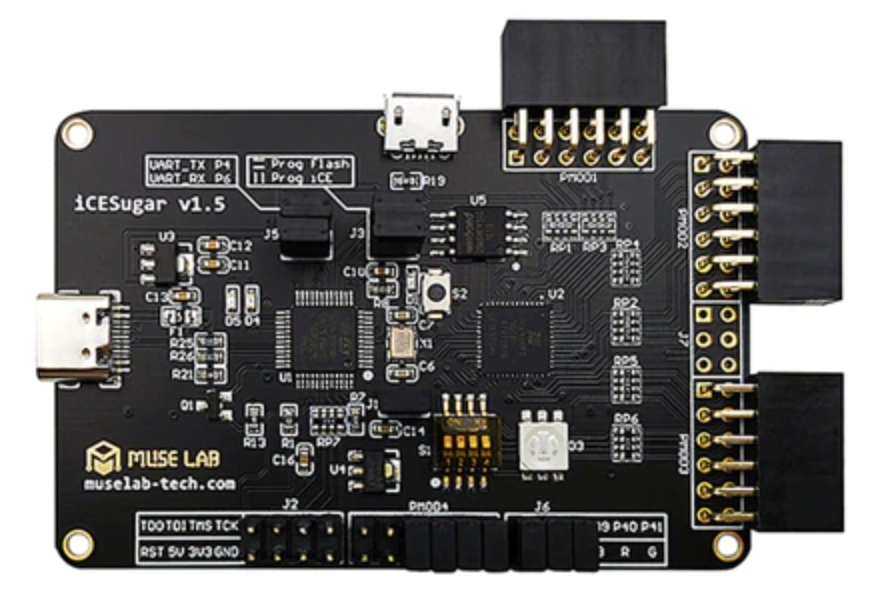
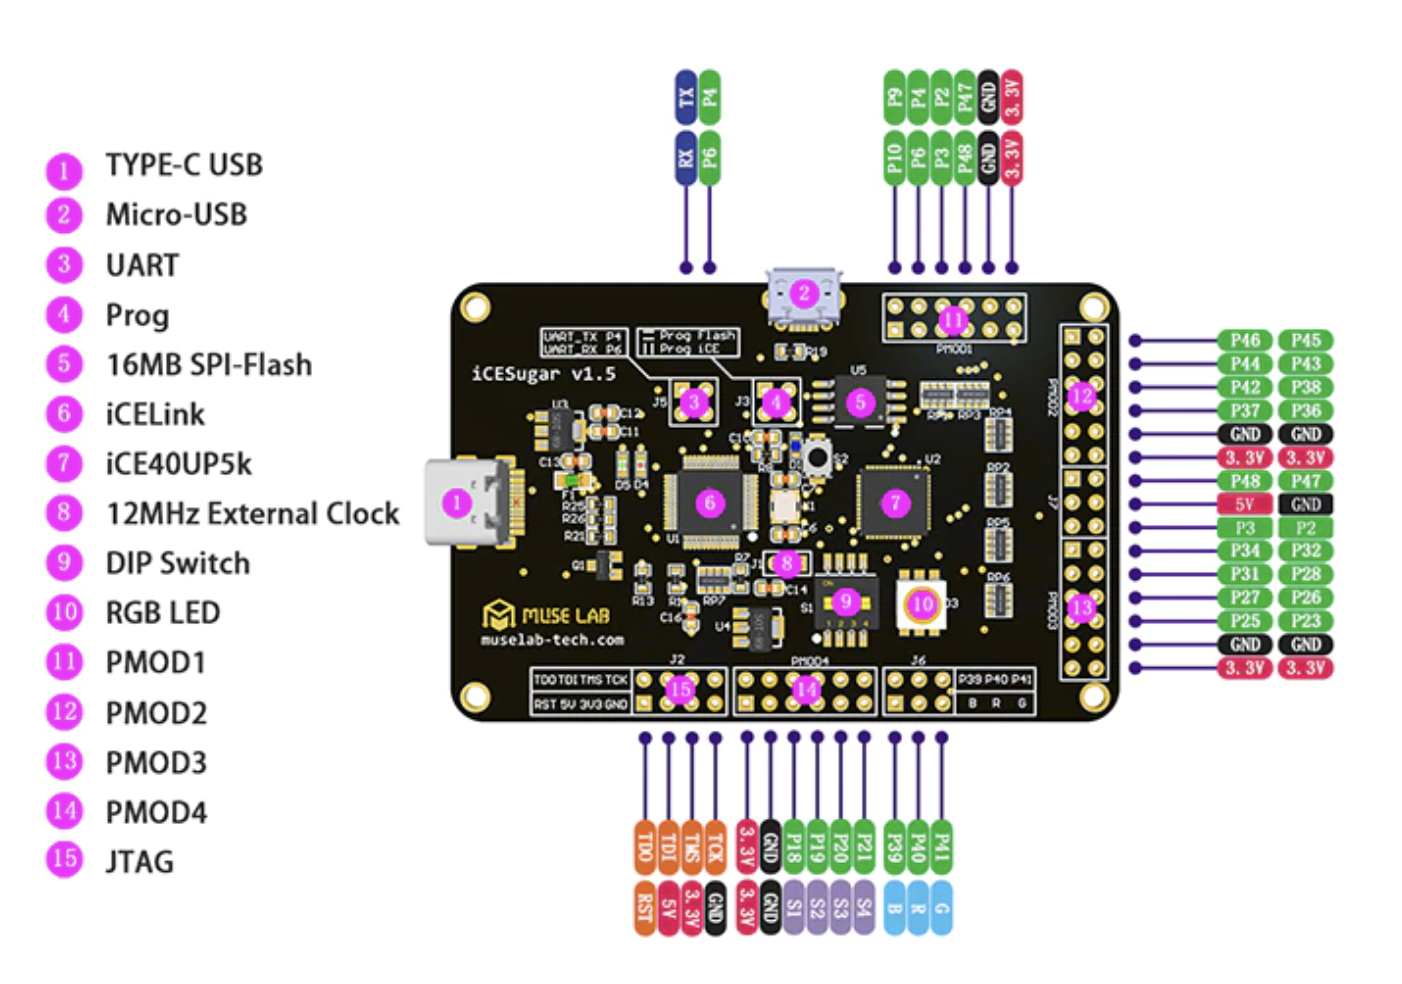
In this tutorial, iCESugar-v1.5 fpga board will be used.
1. Connect the primary UART (UART0) interface of your FPGA board to a serial port of your host computer.
If you are using wsl/wsl2, follow the procedures below:
# Run Bash:
$ sudo apt install linux-tools-5.4.0-77-generic hwdata
$ sudo update-alternatives --install /usr/local/bin/usbip usbip /usr/lib/linux-tools/5.4.0-77-generic/usbip 20

# Run Powershell in administrator mode:
$ usbipd wsl list
# Select the bus ID of the device you’d like to attach to WSL and run:
$ usbipd wsl attach --busid <busid>

# Run Bash to check if the target device is attached or not:
$ lsusb
2. Open a connection to the the serial port your UART is connected to. Configure the terminal setting according to the following parameters:
$ sudo gtkterm- 19200 Baud
- 8 data bits
- 8 data bits
- no parity bits
- no transmission/flow control protocol
- receiver (host computer) newline on
\r\n(carriage return & newline)
Generate Target Bootloader Bitstream
$ cd {path to neorv32-setups}/osflow
$ sed -i 's/-p \\/-m ghdl -p \\/g' synthesis.mk

# make target bitstrem, since iCESugar-v1.5 fpga board is used:
$ make BOARD=iCESugar-v1.5 MinimalBoot

# Details of generating other types of bootloader bitstream are mentioned in {path to neorv32-setup}/osflow/README.md

# the following 3 files are generated: neorv32_iCESugar-v1.5_Minimal.asc, neorv32_iCESugar-v1.5_Minimal.bit, neorv32_iCESugar-v1.5_Minimal.json
Flash an Executable into FPGA Board using Bootloader
$ icesprog neorv32_iCESugar-v1.5_Minimal.bitThe bootloader program is now flashed into the fpga, now press the NEORV32 reset button to restart the bootloader, and the following lines will be shown:
<< NEORV32 Bootloader >>

BLDV: Feb 16 2022
HWV:  0x01060709
CLK:  0x05f5e100
ISA:  0x40901107 + 0xc000068b
SOC:  0x7b7f402f
IMEM: 0x00008000 bytes @0x00000000
DMEM: 0x00004000 bytes @0x80000000

Autoboot in 8s. Press any key to abort.
Aborted.

Available commands:
 h: Help
 r: Restart
 u: Upload
 s: Store to flash
 l: Load from flash
 e: Execute
CMD:>
Follow the procedures below:
1. Execute the “Upload” command by typing u. Now the bootloader is waiting for a binary executable to be send.
CMD:> u
Awaiting neorv32_exe.bin...
2. Use the “send file” option of your terminal program to send a NEORV32 executable (neorv32_exe.bin) to genterate neorv32_exe.bin, using the exmaple in neorv32-setup/sw/exmaple/demo_blink_led:
$ make clean_all install
Memory utilization:
   text    data     bss     dec     hex filename
   1004       0       0    1004     3ec main.elf
Compiling ../../../sw/image_gen/image_gen
Installing application image to ../../../rtl/core/neorv32_application_image.vhd

# now main.bin have been generated
3. If everything went fine, OK will appear in your terminal:
CMD:> u
Awaiting neorv32_exe.bin... OK
4. The executable is now in the instruction memory of the processor. To execute the program right now run the “Execute” command by typing e:
CMD:> u
Awaiting neorv32_exe.bin... OK
CMD:> e
Booting...
Flash an Execuatble into FPGA Board Directly
If you do not want to use the bootloader (or the on-chip debugger) for executable upload or if your setup does not provide a serial interface for that, you can also directly install an application into embedded memory.
$ sed -i 's/MEM_INT_IMEM_EN => false/MEM_INT_IMEM_EN => true/g' {path to neorv32-setup}/neorv32/rtl/core/neorv32_top.vhd
$ sed -i 's/INT_BOOTLOADER_EN => true/INT_BOOTLOADER_EN => false/g' {path to neorv32-setup}/neorv32/rtl/core/neorv32_top.vhd
To generate an “initialization image” for the IMEM that contains the actual application, run the install target when compiling your application, using the exmaple in neorv32-setup/sw/exmaple/demo_blink_led:
$ make clean_all install
Memory utilization:
   text    data     bss     dec     hex filename
   3176       0     120    3296     ce0 main.elf
Compiling ../../../sw/image_gen/image_gen
Installing application image to ../../../rtl/core/neorv32_application_image.vhd
The install target has compiled all the application sources but instead of creating an executable (neorv32_exe.bit) that can be uploaded via the bootloader, it has created a VHDL memory initialization image core/neorv32_application_image.vhd.
This VHDL file is automatically copied to the core’s rtl folder (rtl/core) so it will be included for the next synthesis.
Then:
- Perform a new synthesis. The IMEM will be build as pre-initialized ROM (inferring embedded memories if possible).
- Upload your bitstream. Your application code now resides unchangeable in the processor’s IMEM and is directly executed after reset.
The synthesis tool / simulator will print asserts to inform about the (IMEM) memory / boot configuration:
NEORV32 PROCESSOR CONFIG NOTE: Boot configuration: Direct boot from memory (processor-internal IMEM).
NEORV32 PROCESSOR CONFIG NOTE: Implementing processor-internal IMEM as ROM (3176 bytes), pre-initialized with application.